The home décor world is buzzing with trends that focus on creativity, nature, and mindfulness. Among the latest and most captivating trends is the rise of DIY moss rugs — lush, green, textural floor coverings that mimic the look and feel of real moss. These stunning creations are taking over Instagram feeds, craft boards, and stylish homes across the globe. But what makes DIY moss rugs so special, and why are so many people choosing to make their own instead of buying store-bought alternatives? At My Craft Master, we’ve watched this trend flourish among craft lovers and homeowners alike who are looking for something more personal, more sustainable, and more Zen
DIY moss rugs are more than just beautiful accents for your floors. They’re creative expressions, wellness enhancers, and conversation starters all rolled into one. Whether you want to upgrade your bathroom with a soft green bath mat or design a large piece for your meditation space, making your own moss rug can be an incredibly rewarding experience. It’s an easy yet fulfilling project that allows you to blend art, nature, and mindfulness into one gorgeous item
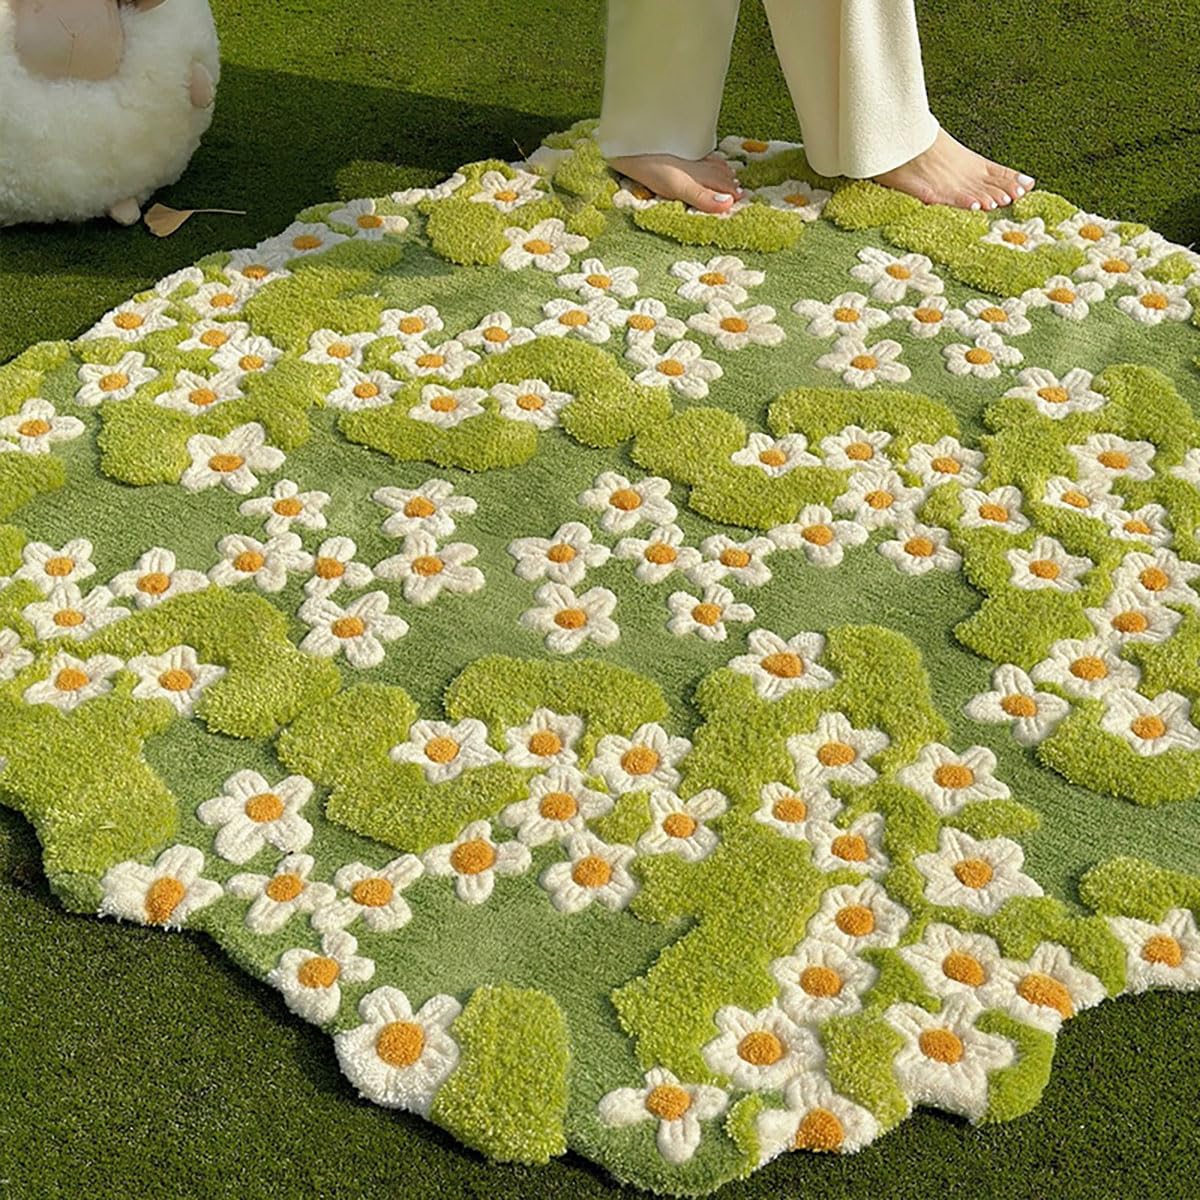
What Are DIY Moss Rugs?
DIY moss rugs are handcrafted floor coverings that imitate the soft, springy feel of natural moss. They are usually made using a combination of felt, foam, preserved moss, recycled fabrics, or yarn that mimics the texture of moss. The materials are attached to a base mat in a creative, free-form design that looks like a piece of nature brought into your home. While some crafters opt for a completely faux approach, others incorporate preserved moss for a more organic look and feel. Either way, the result is a one-of-a-kind rug that brings natural serenity into your space
What sets DIY moss rugs apart from mass-produced décor is the personal touch. When you make it yourself, every tuft of “moss” is placed with care, every inch of fabric reflects your style, and the end product tells a story. It’s not just about having a trendy rug — it’s about creating a meaningful piece with your own hands
Why DIY Moss Rugs Are So Popular
There’s a reason why so many design enthusiasts and craft lovers are falling in love with DIY moss rugs. For one, they look absolutely stunning. Their rich green tones, layered textures, and soft feel add depth and warmth to any room. But their popularity goes beyond looks. Here are a few reasons why DIY moss rugs have become a top choice for creative home decorators
1. Unique and Customizable
Unlike store-bought rugs that come in standard patterns, a DIY moss rug is entirely customizable. You can choose the size, shape, materials, and color scheme that fits your aesthetic. Whether you prefer minimal forest tones or vibrant mixed greens, your rug can reflect your vision perfectly
2. Therapeutic Crafting Experience
Creating a moss rug is not just about the end result. The process itself is incredibly calming and satisfying. Many crafters describe the experience as meditative. Working with your hands, arranging pieces, and seeing your project come to life provides a unique kind of fulfillment and stress relief
3. Sustainable and Eco-Friendly
DIY moss rugs are a great way to practice sustainable crafting. You can repurpose old clothes, felt scraps, or foam remnants instead of buying new materials. Choosing eco-friendly glue or natural moss further reduces your environmental footprint. It’s a small project that can contribute to a larger goal of conscious living
4. Conversation Starter
Let’s face it — moss rugs aren’t something you see in every home. When guests see your handmade rug, they’ll be instantly intrigued. It becomes a talking point, a reflection of your creativity, and a memorable feature in your décor
How to Make Your Own DIY Moss Rug
Making a DIY moss rug doesn’t require professional skills. Even beginners can create beautiful results with a few basic tools and a little patience. At My Craft Master, we offer easy-to-follow kits that include all the essential materials and instructions to get you started. Here’s a general overview of the process
Step 1: Gather Your Materials
You’ll need a sturdy non-slip base mat (like a bath mat or rubber backing), a glue gun or strong fabric adhesive, scissors, and your choice of moss-like materials. This can include felt cutouts, foam chunks, preserved moss, or even upcycled green fabric
Step 2: Plan Your Design
Before you begin gluing, lay out your pieces and plan the design. Consider mixing different shades and textures for a realistic, forest-floor look. You can go for an organic free-form pattern or a more structured layout depending on your preference
Step 3: Attach the Moss Pieces
Using your adhesive, begin securing the moss materials to the base mat. Work in small sections to ensure even coverage and strong adhesion. Be sure to press firmly so the materials stick well and don’t come loose with use
Step 4: Add Final Touches
Once the base is covered, you can add decorative details like small stones, bark textures, or tiny faux mushrooms for a woodland vibe. Let everything dry completely before placing your rug in its new home
Step 5: Enjoy and Show Off Your Work
Once your rug is ready, place it in your chosen spot and enjoy the compliments. Whether it’s in your bathroom, reading nook, or yoga studio, your DIY moss rug will stand out as a beautiful blend of nature and craftsmanship
Where to Use Your DIY Moss Rug
Bathroom
Create a soft, natural spa atmosphere by placing your DIY moss rug near the bathtub or sink. It’s absorbent, visually soothing, and instantly upgrades your daily routine
Living Room or Reading Corner
Add it as a unique accent under a coffee table, beside an armchair, or as a textured piece in a quiet reading nook. It adds interest and calmness to any space
Bedroom
Put it at the side of your bed so your feet can land on a soft, mossy surface every morning. It’s a grounding way to start the day
Yoga or Meditation Space
Use it as a serene focal point in your wellness corner. The soft texture and natural tones enhance your mindfulness practice
Tips for Maintaining Your DIY Moss Rug
DIY moss rugs are surprisingly easy to maintain. Here’s how to keep them looking fresh and beautiful
- Keep them out of direct sunlight to prevent fading
- Dust them regularly with a vacuum using a brush attachment
- Spot clean gently with a damp cloth if needed
- Avoid placing them in high-moisture areas if using preserved moss
By following these simple steps, your rug will continue to look and feel amazing for years
Final Thoughts
If you’re looking for a creative project that adds beauty, peace, and personality to your home, DIY moss rugs are a trend you’ll wish you had started sooner. Not only are they visually stunning, but they also offer a sense of accomplishment and wellness that store-bought décor simply can’t match. They’re customizable, sustainable, and surprisingly easy to make — the perfect combination for today’s mindful makers
At My Craft Master, we believe that every home should reflect the creativity and calm of the people who live there. That’s why we offer high-quality DIY moss rug kits that help you bring your vision to life. So why wait? Start your moss rug project today and create something truly special
Frequently Asked Questions
1. Can I make a DIY moss rug if I’m a beginner?
Absolutely yes. Our kits are designed to be beginner-friendly and include step-by-step instructions. No prior experience is required
2. How long does a DIY moss rug take to complete?
Depending on the size and complexity, it can take anywhere from 2 hours to a weekend project. Most crafters finish in a day
3. Are DIY moss rugs safe for pets and kids?
Yes, especially when using non-toxic materials and adhesives. Faux moss rugs made from felt and fabric are soft and safe for little ones and furry friends alike. Click here to return to the homepage and unlock more content.